Once you have enough details on the verified user, you will want to move forward and reflect their verification status in the system.
The verification status can be one of the following: Active, Banned, and Unconfirmed.
The default status that each created user starts with is Unconfirmed.
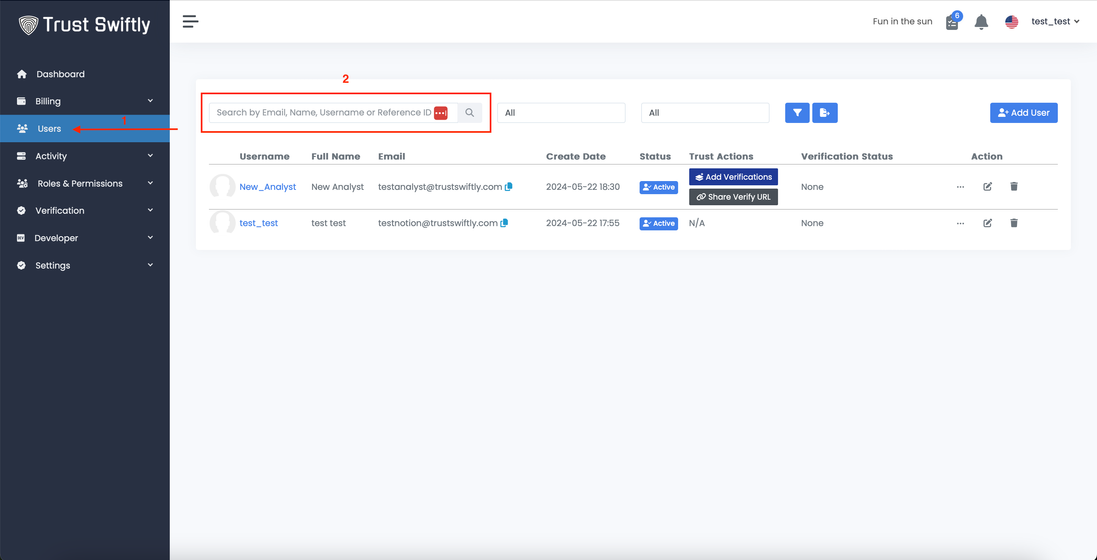
The user status appears in the user table under the ‘status’ column

To change the user’s status, follow the following steps:
Step 1: Locate the user. To locate the user, you can click on this link https://NAME.trustswiftly.com/user, replacing NAME with the name of your company, or choosing the ‘users’ entry from the side menu and using the search input box appears at the top of the page.

Step 2:
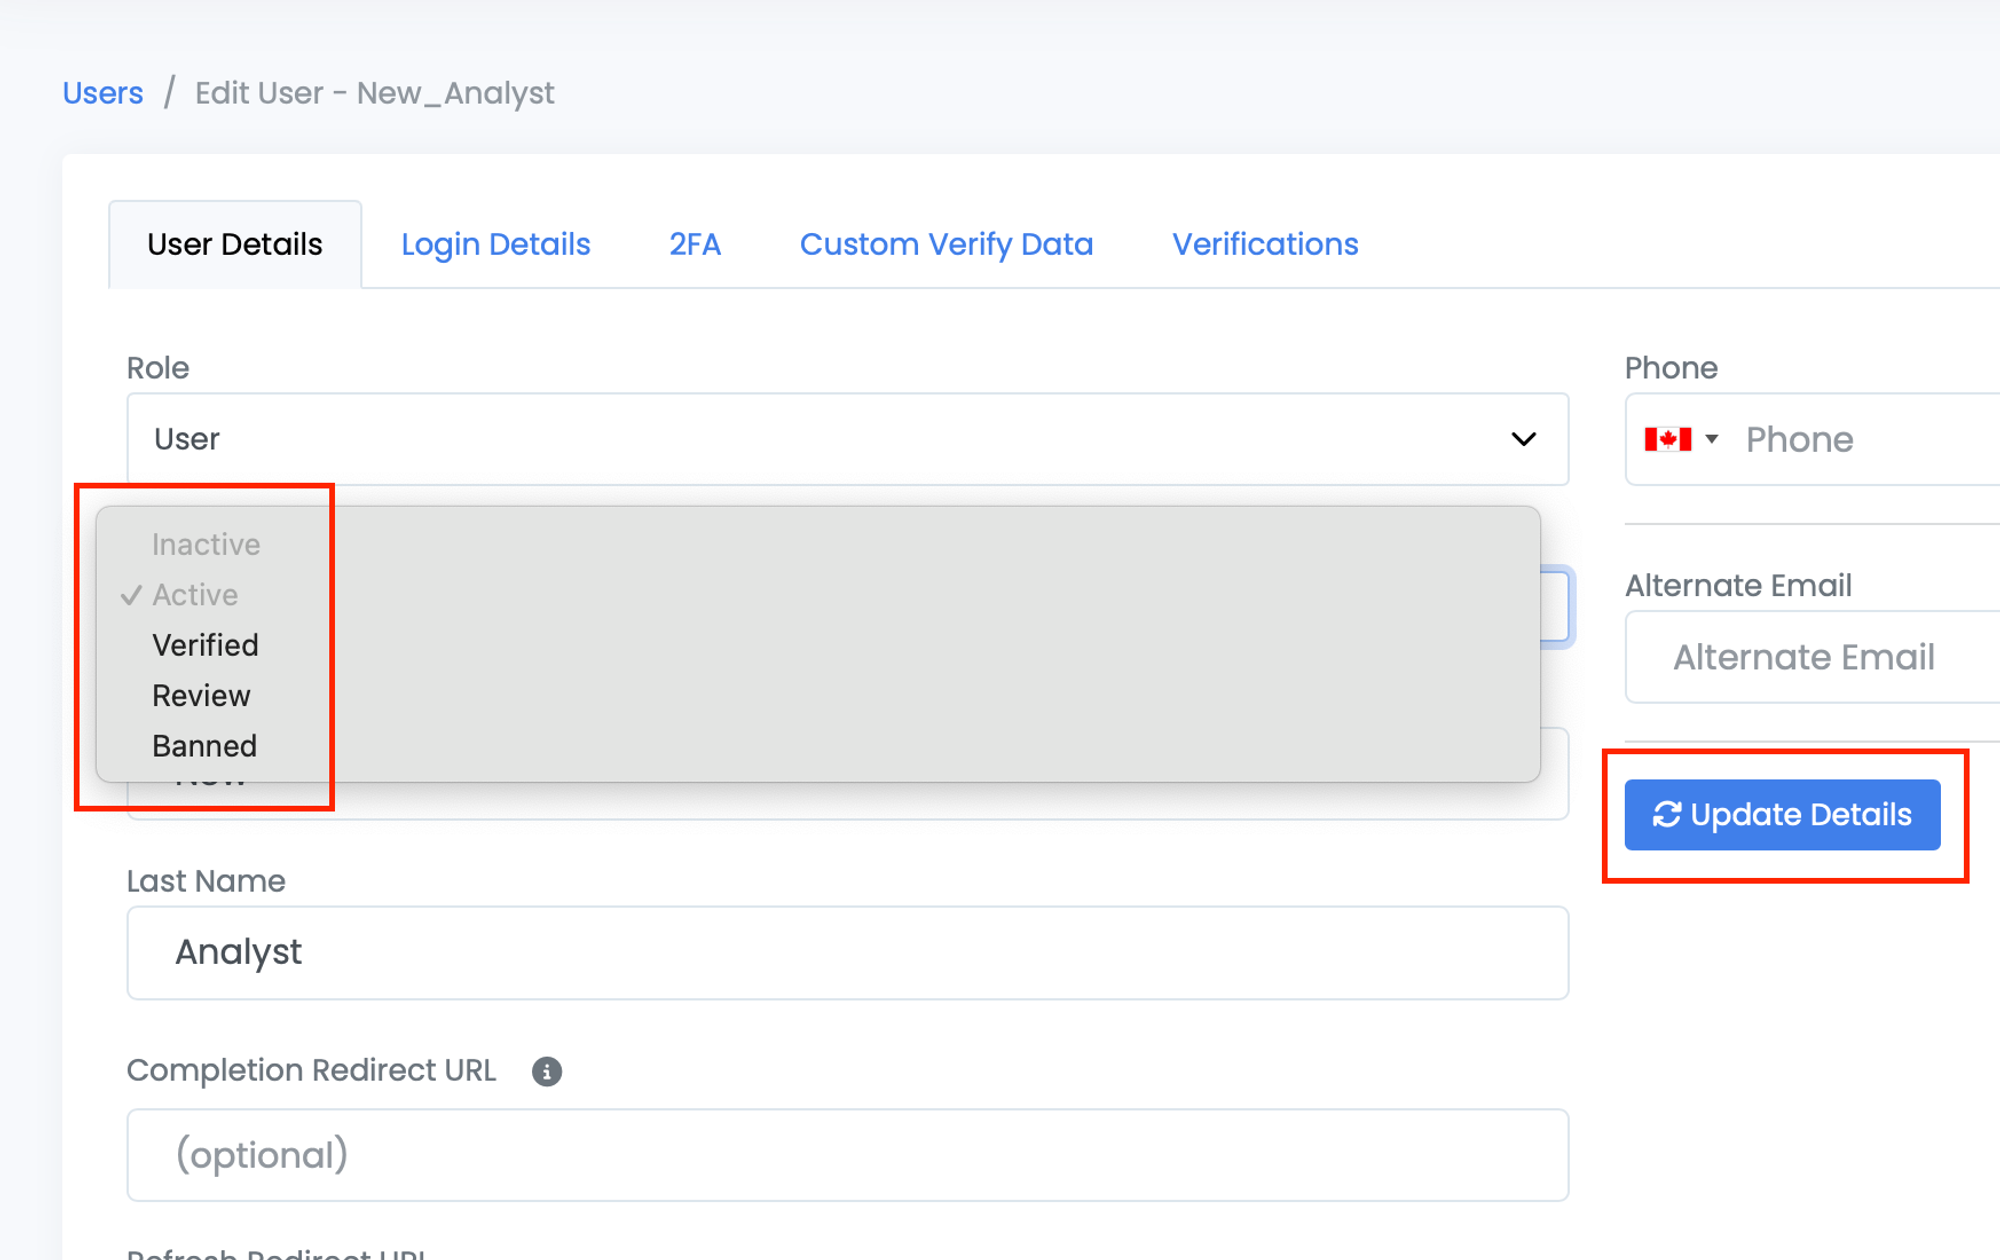
Change the user Status
. To change the user statue, click on the edit icon appear at the end of the user row under the ‘Action’ column

The user details page will be opened. You will see the ‘status’ selection, from which you can change the user status. Once complete, click on the ‘update details’ button, and the updated status will be saved.
