
How to Share Verification Link
Once completed updating verification requirements or the user lost their verification link, you could create a new one. The link is unique per user.
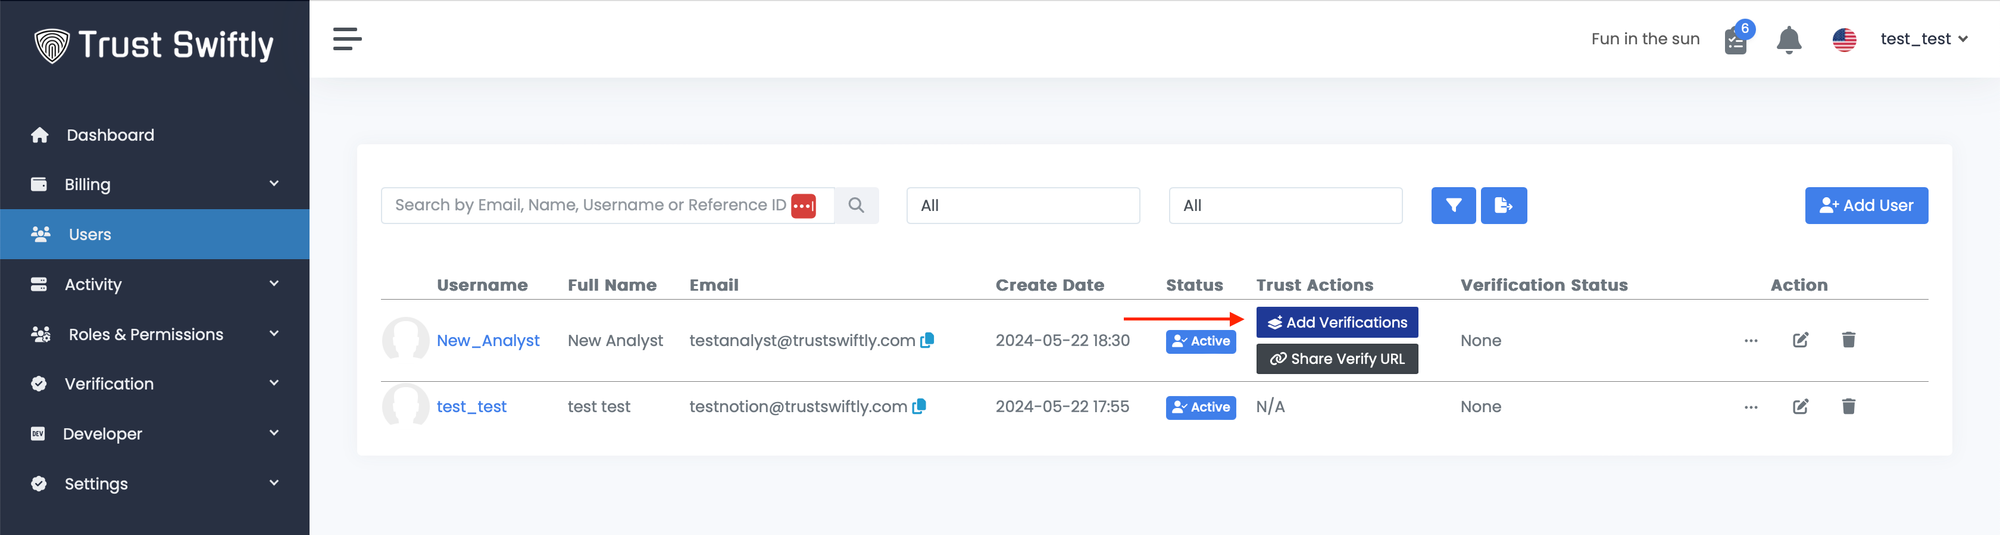
Step 1: Locate the user. To locate the user, you can click on this link https://NAME.trustswiftly.com/user, replacing NAME with the name of your company, or choosing the ‘users’ entry from the side menu and using the search input box appear at the top of the page

Step 2: Share the verification link. Click on the ‘Share Verify URL’ button to appear in the user row.
Once saved, the user can refresh their existing session or visit the verified URL.
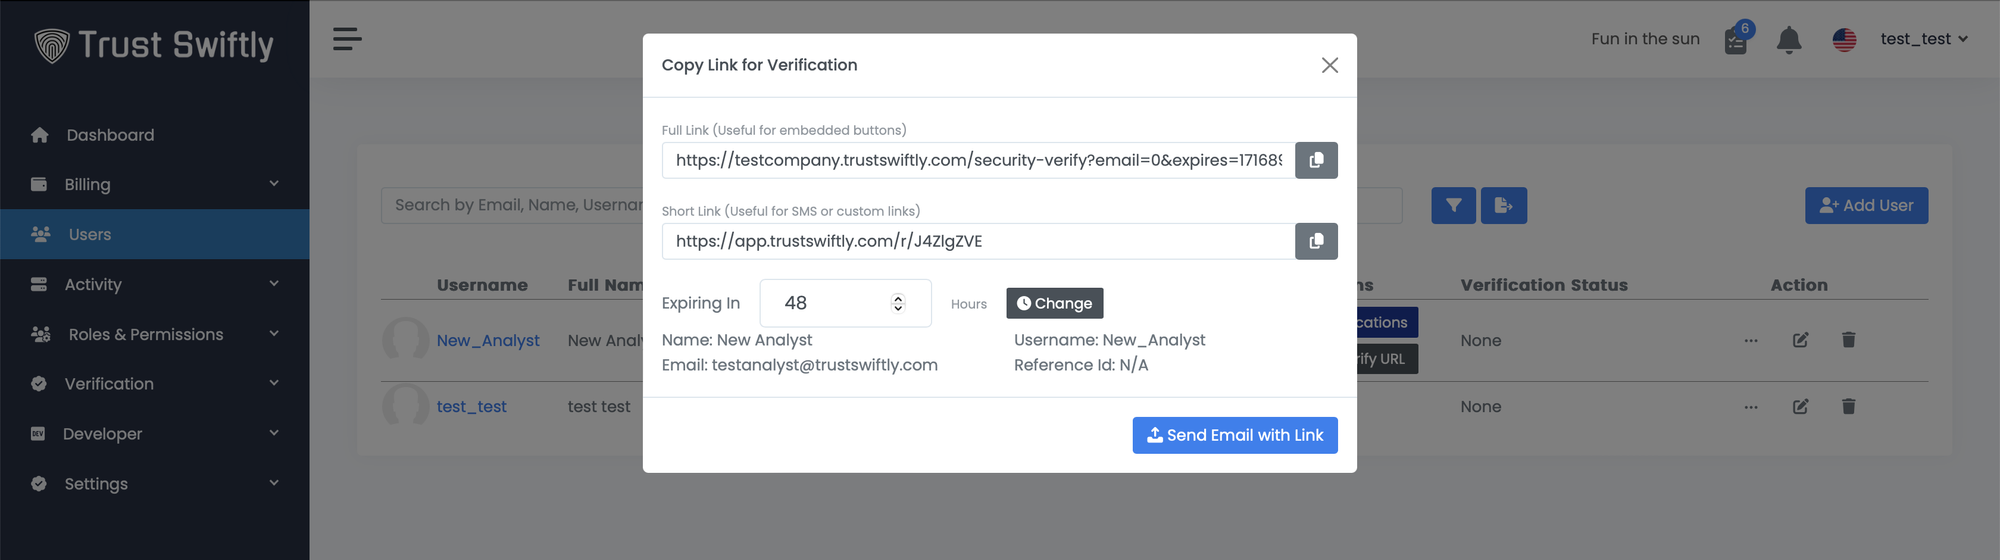
A popup will be opened, allowing you to define the link expiration time and choose between a regular and a short link. Once completed, click on the ‘Send Email with Link’ button, and the user will receive the link.
Alternatively, you can copy the link and paste it wherever you desire.
How to Share Self-Service Signup
This option can be used If you have a similar verification pattern or want to allow users to verify themselves without creating the user via the Add User interface, API, or embedded method. The self-service signup option should be used for this automated method. This method requires no integrations with your existing site.
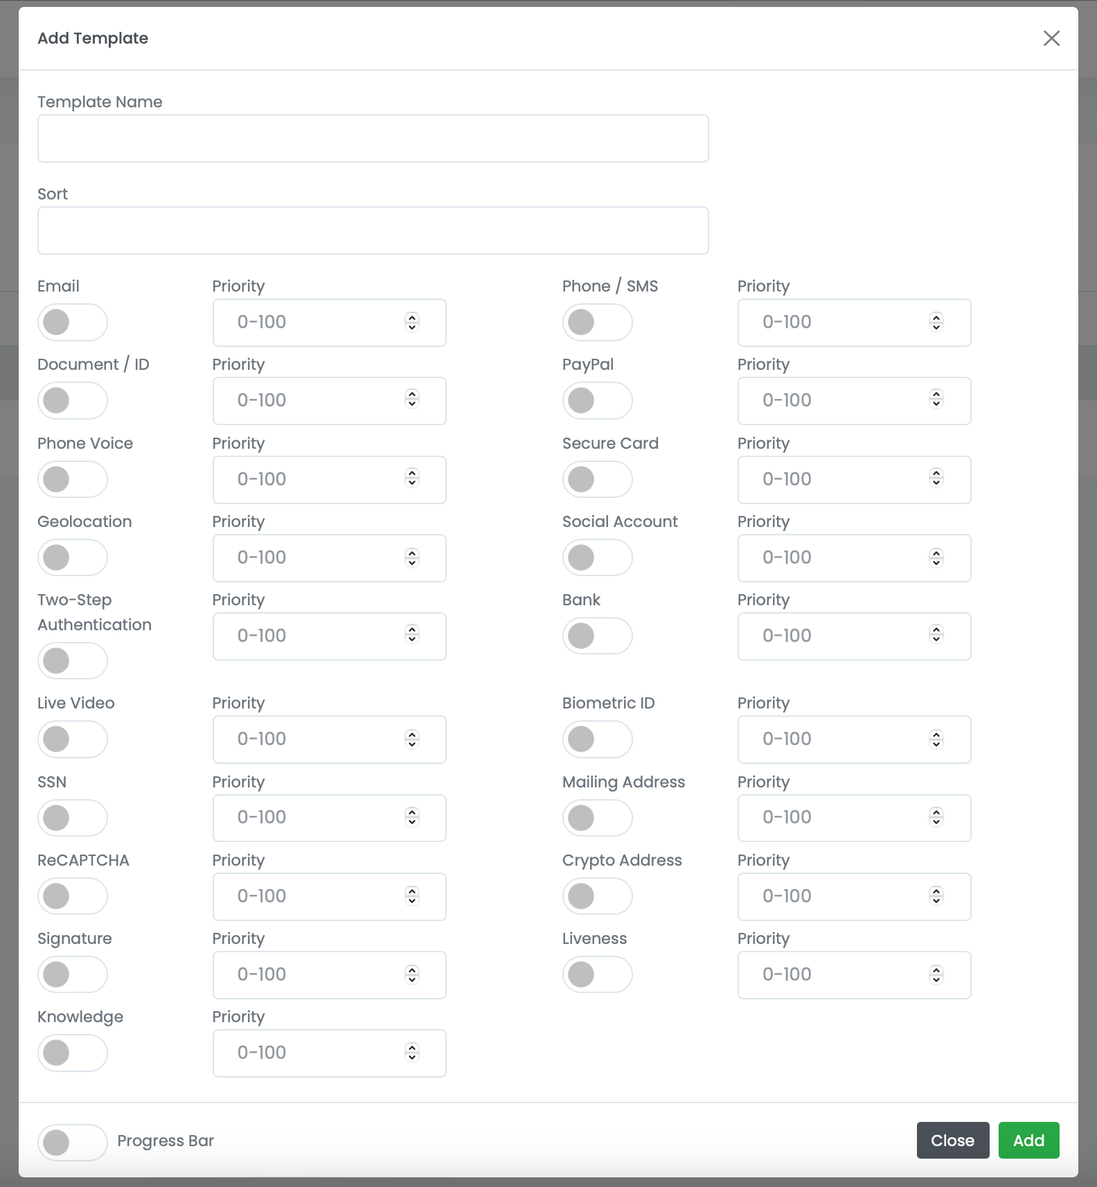
Step 1: Setup a template. A template can be created for users that signup. https://NAME.trustswiftly.com/settings/templates, replacing NAME with the name of your company. Select the default verifications and any ordering if required then click Add.
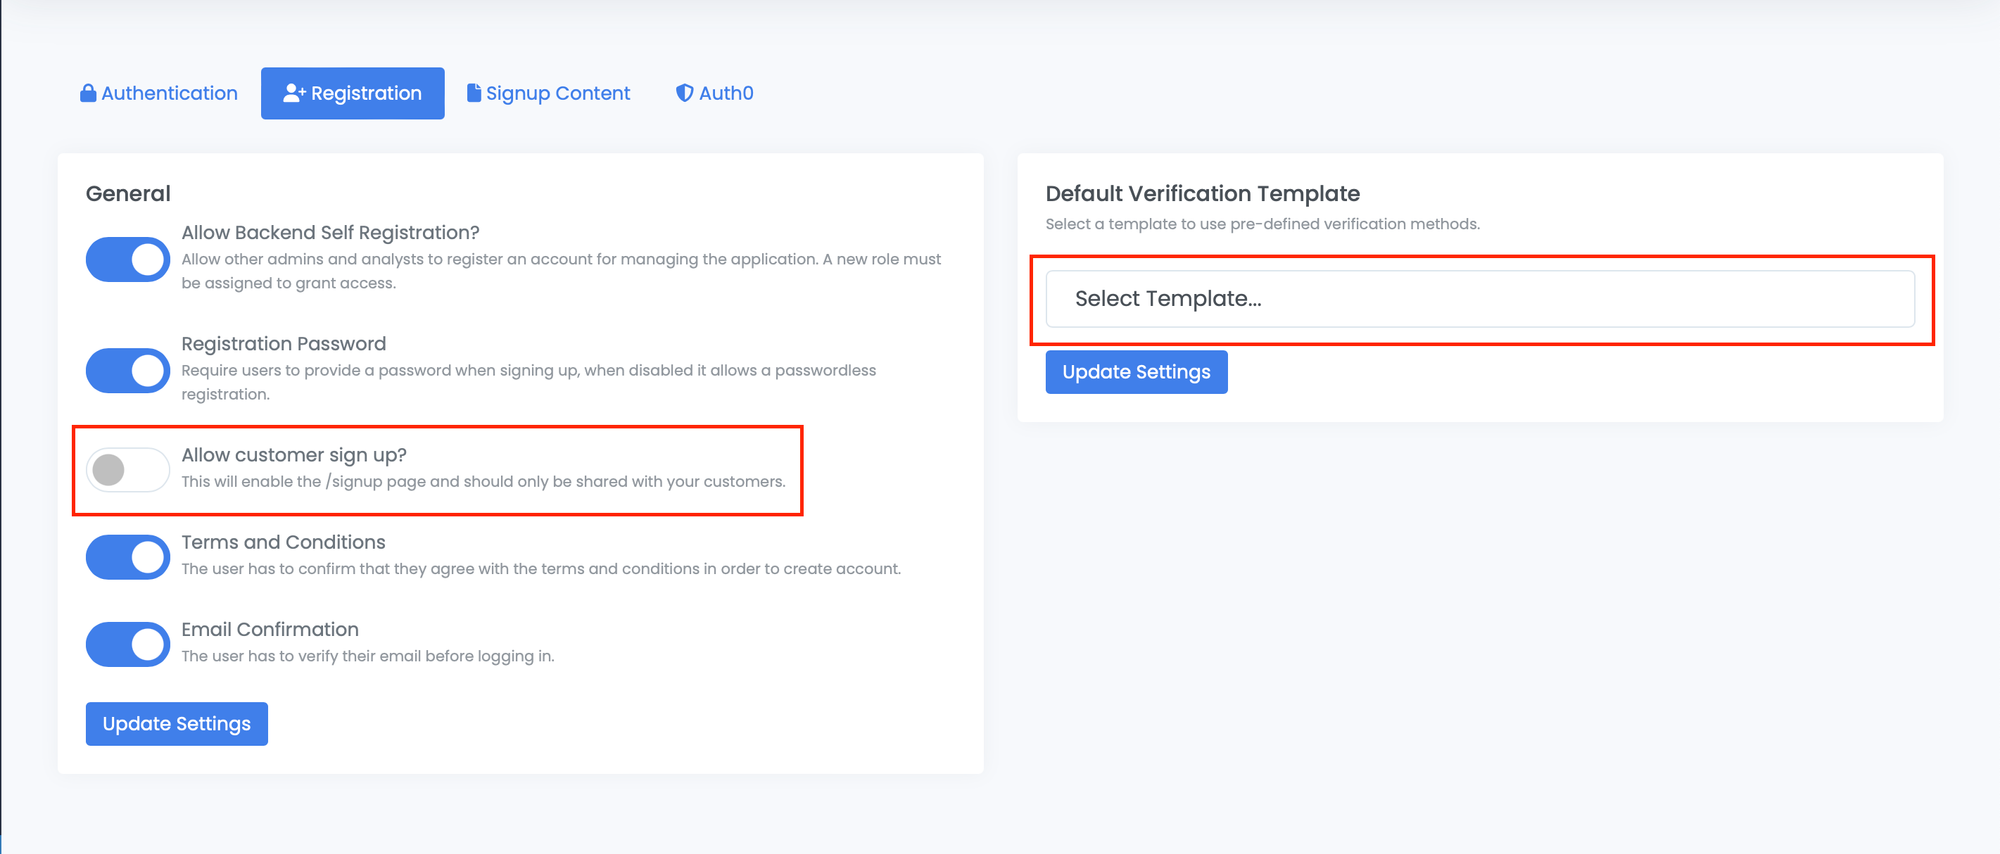
Step 2: Enable signups. Allow users to signup and select the default verification template. https://NAME.trustswiftly.com/settings/auth
Step 2: Share signup url. You can inform users to register an account and complete verifications at https://NAME.trustswiftly.com/signup Once they register an account they will be directed to the verification page.