To create a new user, you will have to follow the following steps:
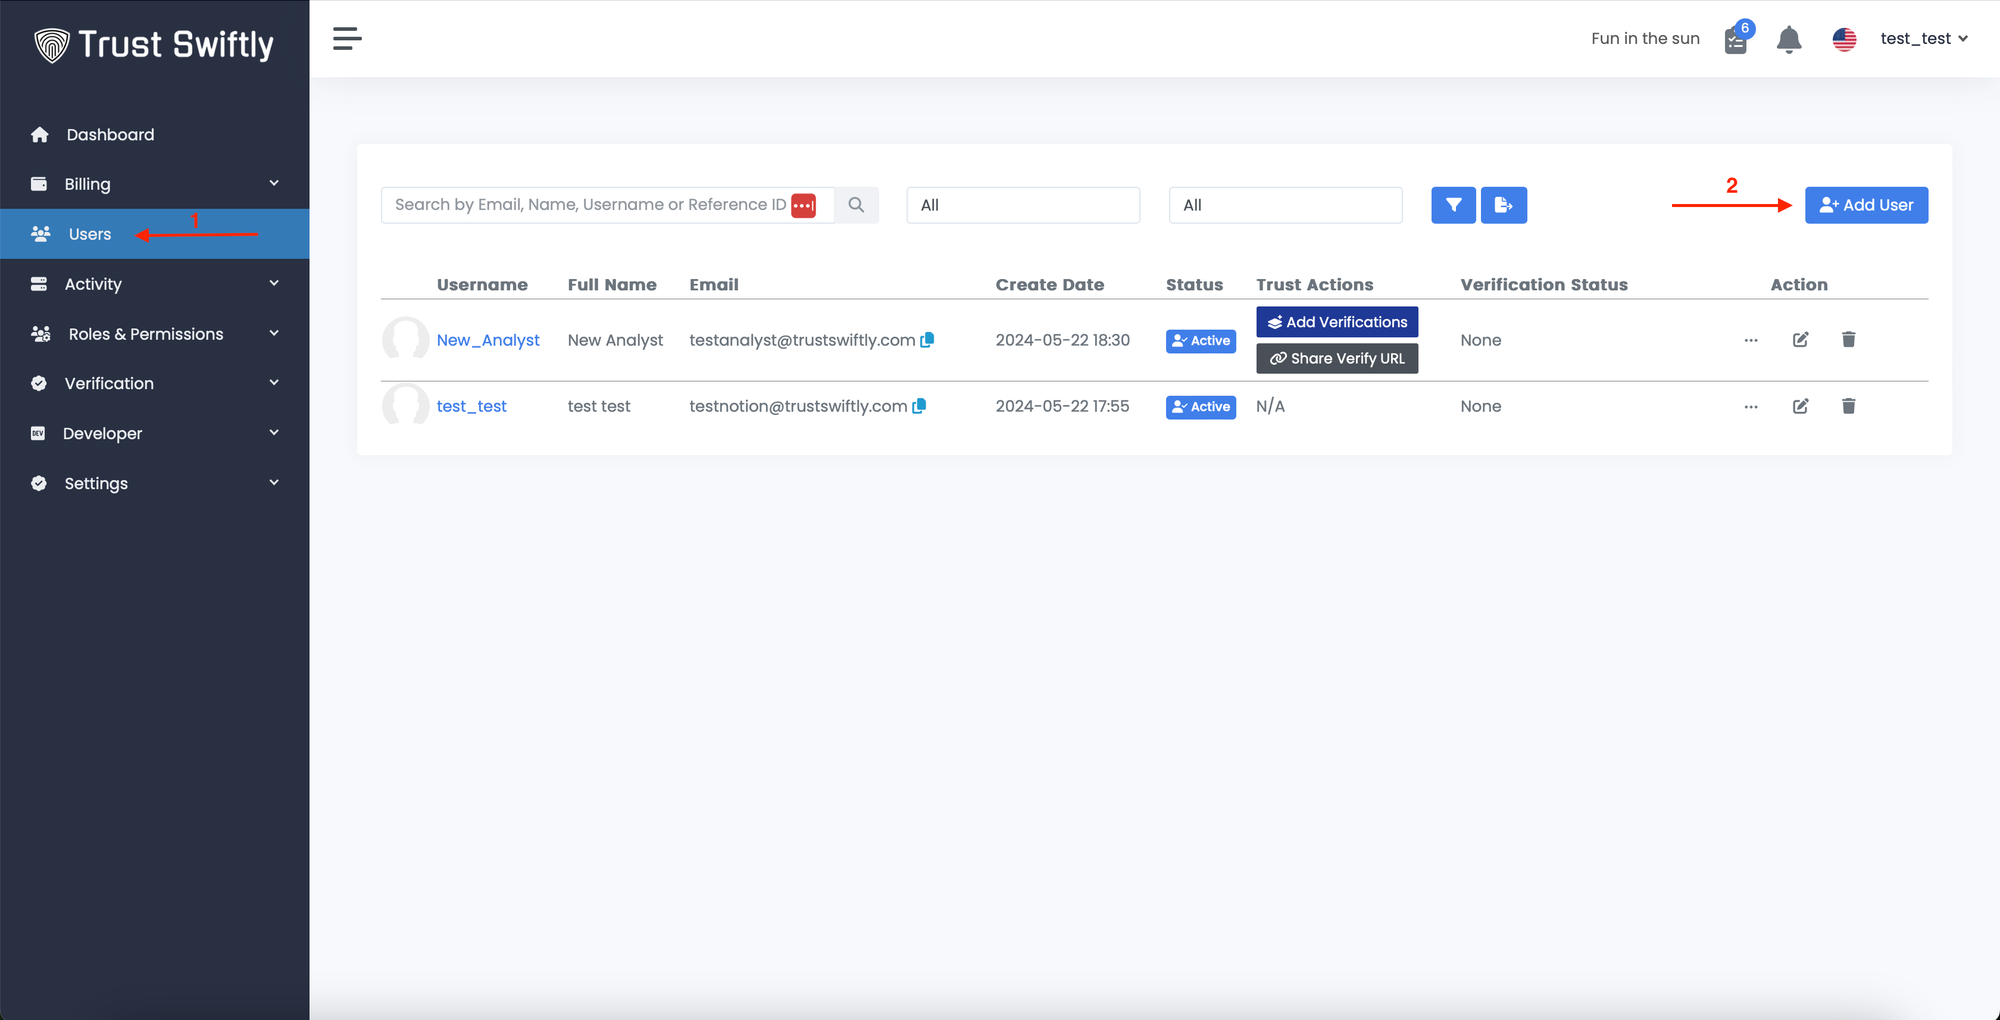
Step 1: Create the user. You can create a new user by either clicking on this link https://NAME.trustswiftly.com/user/create, replacing NAME with the name of your company, or by choosing the ‘users’ entry from the side menu and clicking on the ‘Add User’ button appears on the top right of the screen

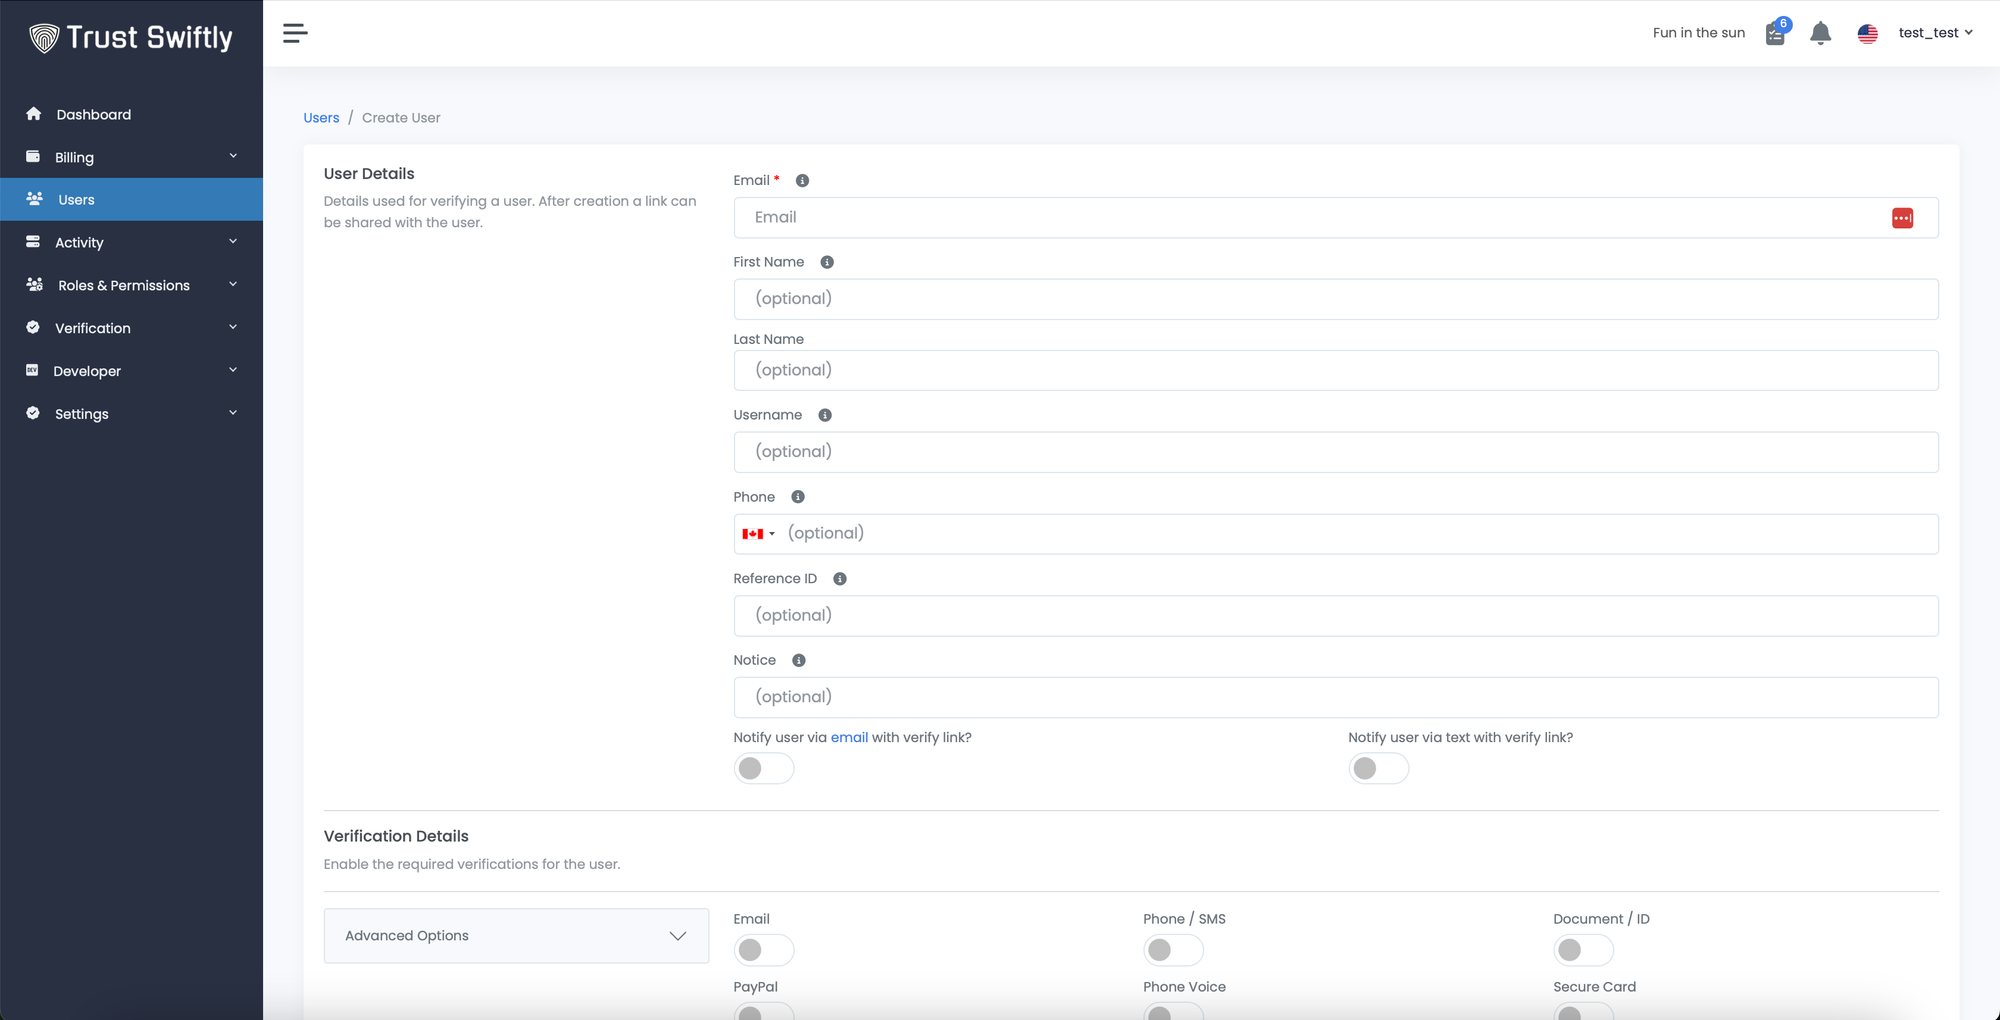
Step 2: Fill in user details. Once clicking on the button, the create new user page will appear. You can insert the user’s information on this screen, including first and last name, user’s email address, phone number, and username. Use the “Reference ID” field for tracking and the notice field for internal use.

Now, decide if you want to notify the user via email or not. Remember, you can change how the email looks. Read more in the site customization section.
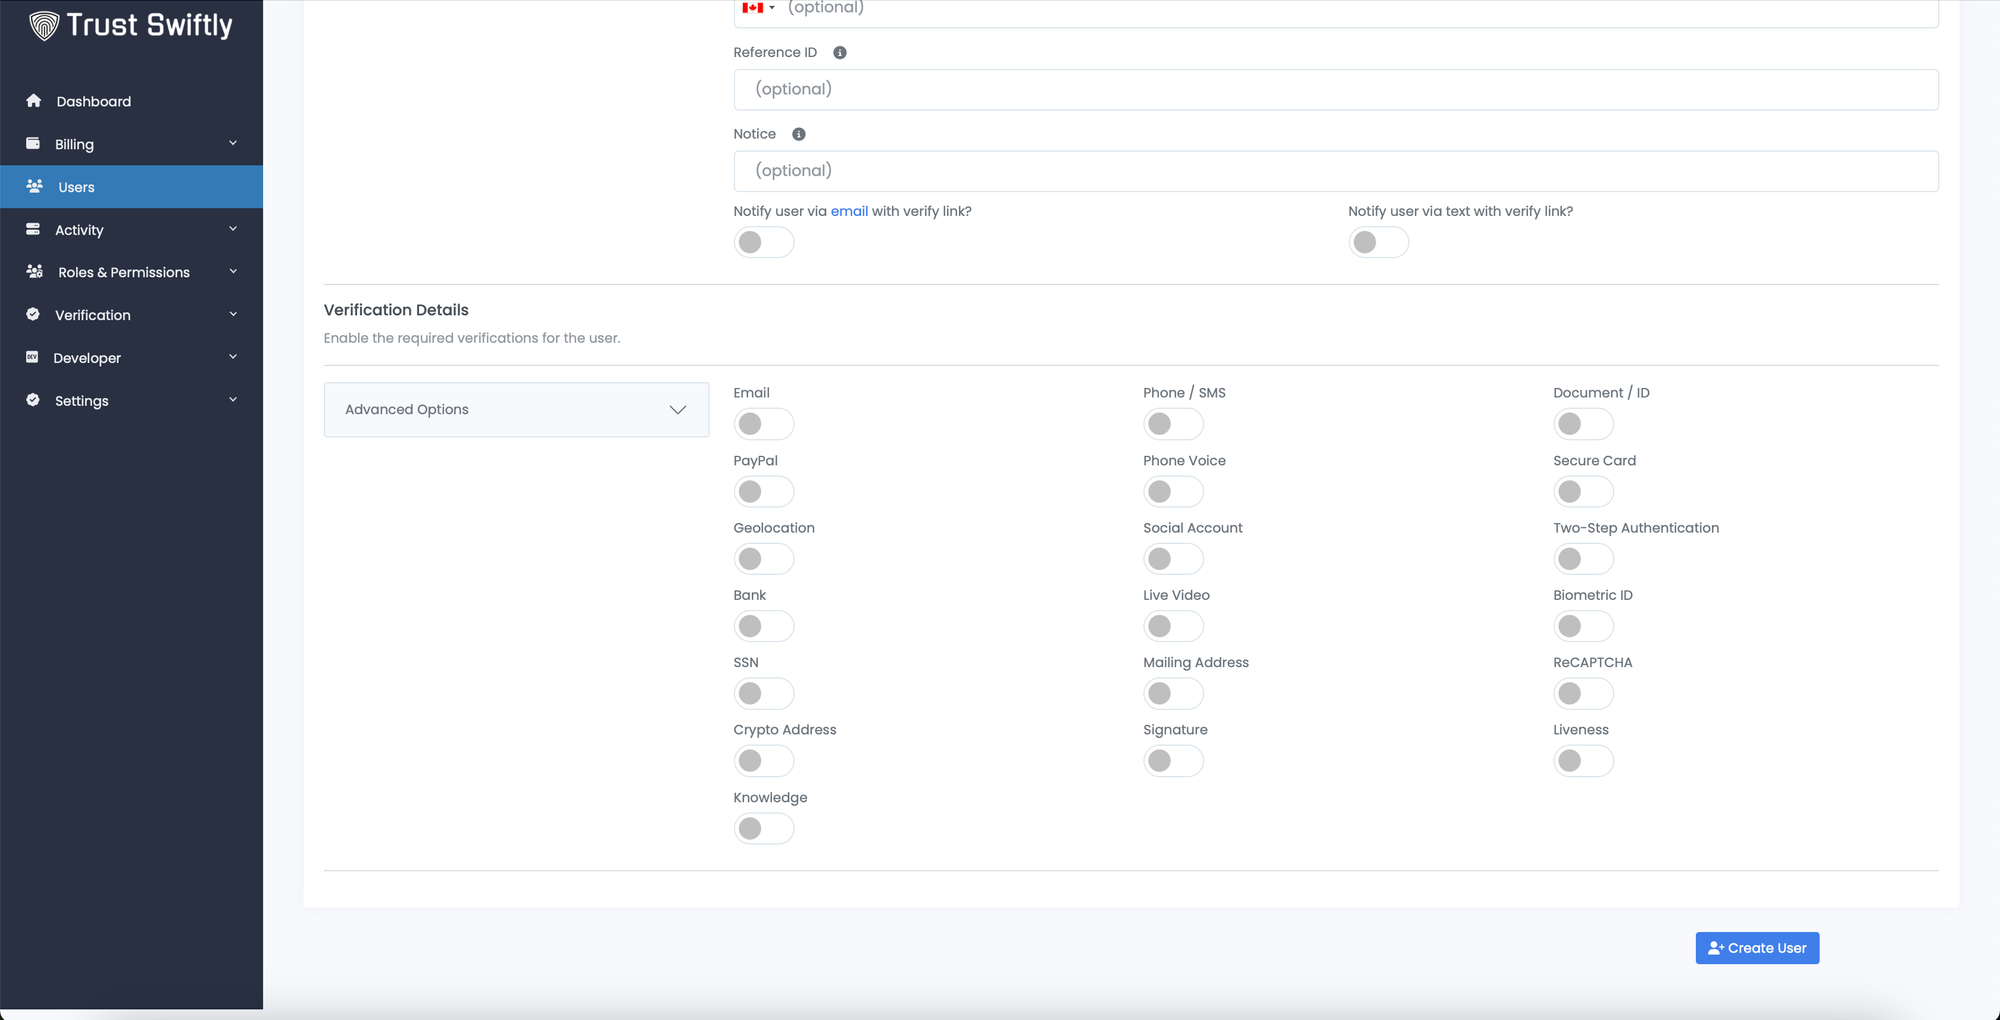
Scrolling down, you can see the list of the supported verifications methods. Simply turn on the desired verification methods by clicking on the toggle button.
Suppose you or your company favors one verification method over the other. In that case, you can add priority to the items by clicking on the verification priority toggle and then defining the importance of each selected verification method.

Once completed creating the user, simply click on the Create User button that appears at the bottom of the page.